Published:
Last Updated:
Category: Job Search Preparation & Interview Tips
Authors: Shusaku Yosa
The first hurdle in any career change is document screening, and the work history document (shokumu keirekisho) is arguably the most important document for conveying your career and capabilities to hiring managers. Yet many people say "I don't know what or how much to write" or "I'm confused about the format."
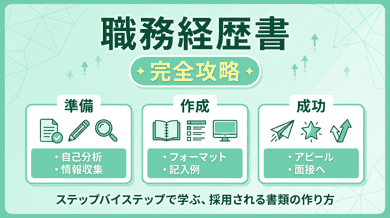
This article comprehensively covers everything from the basic structure of a work history document to choosing among three formats, a section-by-section writing guide, job-specific examples, and ready-to-use template information. Whether you're creating one for the first time or revising an existing document, bookmark this guide for reference.
A work history document (shokumu keirekisho) is a detailed record of your work experience, achievements, and skills. While a resume (rirekisho) conveys your basic profile information, a work history document specifically demonstrates "what you can do" and "what results you've achieved" — it's essentially a sales pitch for yourself.
Resumes have standardized fields for education, employment history, qualifications, and motivation. Work history documents, however, offer formatting flexibility — the layout and presentation themselves demonstrate your business sense. Think of it as "a business proposal to sell yourself."
Generally, a work history document should be 2 pages on A4 paper, with 3 pages as the maximum. Too few pages may signal insufficient information, while too many risk burying key points.
To write an effective work history document, first understand the hiring manager's perspective. HR professionals reportedly spend an average of just 30 seconds to 1 minute evaluating each document. To make the most of that limited time, keep these five points in mind.
First: "Can you hit the ground running?" They're checking how much your experience overlaps with the open position. Don't just list duties — place relevant experience in prominent positions.
Second: "Can you demonstrate results with numbers?" Quantified achievements — sales up X%, costs reduced by X, X cases handled monthly — are exponentially more convincing. Even in roles where numbers are hard to come by, try using project scale or team size.
Third: "Is there career consistency?" Even with multiple job changes or cross-industry transitions, having a clear thread of skills or career direction makes a strong impression. Use your career summary to articulate your story.
Fourth: "Document quality." Your work history document is itself a business document, so layout clarity, absence of typos, and logical structure are directly evaluated as indicators of your work quality.
Fifth: "Can I envision their post-hire contribution?" Beyond past experience, conveying "how you plan to apply that experience" helps hiring managers concretely imagine your future impact.
There are three main formats for work history documents. Choosing the one that fits your career allows you to maximize your strengths.
This is the most standard format, listing your career from earliest to most recent. It effectively shows career progression over time, making it ideal for those with long tenure in the same industry or role. However, your most recent experience ends up at the bottom, potentially escaping the hiring manager's attention. Best suited for those in their 20s to early 30s with fewer job changes.
This format lists your most recent role first and works backward. Since your latest experience appears at the top, it immediately communicates "what you can do now." It's especially effective when your most recent experience directly relates to the target position. This is the most commonly used format in career changes, well-suited for mid-career professionals in their 30s and beyond.
Rather than chronological order, this format organizes experience by functional area or project. Ideal for those with diverse cross-industry or multi-role experience, or technical professionals with extensive project histories. It excels at highlighting depth in specific skills, though tenure dates become less visible — add a brief career timeline at the top to compensate. Particularly effective for engineers, consultants, and creative professionals evaluated on skill sets.
Let's go through each section of the work history document. For every section, the guiding principle is: "Can the hiring manager understand this quickly?"
The career summary is a 3–5 line overview placed at the top of your document. It's the first thing the hiring manager reads, and if it doesn't capture their interest, they may not continue. Use formats like "X years in [industry]," "specialist in XX," or "most recently focused on XX" to condense your career highlights. Intentionally weaving in keywords relevant to the target company is also effective.
For the main employment history, list company name, tenure, business description, company size, employment type, department, and title, followed by responsibilities and achievements. Don't just list duties — use the "Challenge → Action → Result" framework for maximum impact. For example: "Facing high customer churn, I built a systematic follow-up process. This improved the churn rate by 30% year-over-year."
When you have experience at multiple companies, give more detail to roles most relevant to the target position and keep less relevant ones concise. Equal treatment of all roles buries your key selling points.
List your certifications, tools, languages, and business skills. Use official certification names with dates obtained. For tools and software, include proficiency level (e.g., "X years of practical experience," "basic operations") so hiring managers can gauge your skill level. Place items matching the job posting's required skills in prominent positions.
Aim for 400–600 characters (approximately 100–150 words in English). Use the PREP method (Point → Reason → Example → Point) to clearly communicate your strength and supporting evidence. For detailed guidance on writing self-PR with job-specific examples, please refer to our article "How to Write a Self-PR for Career Change | Finding Your Strengths & Job-Specific Templates."
The emphasis points for a work history document vary significantly by job type. Here are writing tips and examples for representative roles.
For sales roles, quantitative data is your greatest asset: personal revenue, quota attainment rate, client count, new accounts per year. Detail your sales methodology (cold calling, inbound, route sales) and product type/price point. Include team management experience with headcount and team-level results.
Administrative roles can be hard to quantify, but look for metrics like monthly transaction volume, processing time reduction, or error rate improvement. Specify tools used (Excel functions/macros, accounting software, ERP systems) with proficiency levels. Process improvement initiatives, manual creation, and mentoring experience are valuable additions.
Engineer documents typically organize by project. For each, specify: duration, overview, team size, phases covered (requirements through operations), technologies used (languages, frameworks, infrastructure), and your role and achievements. Create a separate technical skills sheet organized by category: languages, frameworks, middleware, cloud services. Upstream experience and leadership roles deserve special emphasis.
For marketing roles, demonstrate the full cycle from planning through execution to measurement. Clearly document: which channels (paid search, social, SEO, offline), what strategies, which KPIs, and what results. Use the format: "Reduced CPA by 30% through search ad optimization" or "Built owned media from scratch to 100K monthly PV." List specific tools (Google Analytics, ad platforms, MA tools) by name.
Key metrics include store scale (revenue, staff count), personal sales, average transaction value, and customer satisfaction scores. Note management duties like staff training, scheduling, and merchandising. When transitioning to a different industry, reframe skills as portable competencies — communication, proposal skills, KPI management — to demonstrate cross-industry applicability.
Even carefully crafted documents can fail screening if they contain these common errors. Always check before submitting.
"Handled XX duties" or "Engaged in XX" alone doesn't convey your performance level. Always follow up with outcomes. Even without direct metrics, cite specific contributions such as "Reduced team overtime through workflow improvements" or "Was entrusted with developing the new hire training program."
Sending the same document to every company is inefficient. Maintain a base for work experience details, but customize your career summary and self-PR for each application. Study the "required skills" and "preferred qualifications" in each job posting and emphasize matching experience and skills to significantly improve your pass rate.
Dense content with inconsistent fonts or unclear headings discourages reading. Use clear section headers, bold company names and dates, and maintain adequate whitespace. When submitting as PDF, verify the layout holds in both screen view and print preview.
Typos alone can create an impression of carelessness. Watch for date format inconsistencies and abbreviated company names. Take a break before proofreading, and ideally have a third party review it as well.
Building from scratch is time-consuming. Templates save layout time so you can focus on content quality. Choose a template matching your career format (chronological, reverse chronological, or functional) with a clean, readable design.
Remember that templates are frameworks — their value comes from filling them with your specific experience and achievements. Replace every placeholder with your own words. We're currently preparing career change templates on our site. To be notified when they're available, please register your email address.
Your work history document doesn't stand alone — it's evaluated holistically with your other application materials. Preparing your motivation statement and self-PR as an integrated set dramatically improves overall consistency.
For motivation statement guidance, see our article "How to Write a Motivation Statement for Career Change | 20 Industry & Job-Specific Examples and Interview Tips." For self-PR, consult "How to Write a Self-PR for Career Change | Finding Your Strengths & Job-Specific Templates" for frameworks, structure, and job-specific examples that directly apply to your work history document's self-PR section.
Before submitting, verify: your career summary conveys key strengths in 3–5 lines; each role follows the "Challenge → Action → Result" framework with quantified outcomes; your highlights align with the target company's ideal candidate profile; and skills/qualifications match the job posting requirements.
For layout, confirm the document fits within 2–3 A4 pages with clear visual hierarchy using headers and bold text. Have a third party check for typos and date inconsistencies. Name the file clearly (e.g., "WorkHistory_Name_Date.pdf") and submit in PDF format.
Your work history document is the single most important business document for conveying your career and capabilities. Start with format selection, lead with career highlights in your summary, organize each role using "Challenge → Action → Result," and close with your post-hire vision in the self-PR section. Just following this flow dramatically improves document quality.
Use the three formats, section-by-section guide, and job-specific examples in this article to create your own original work history document. After clearing document screening, interviews await. Prepare your self-PR and motivation statement in parallel for a consistent narrative throughout the entire selection process. With thorough preparation, make your career change a success.

Master the use of 「当社」(tosha), 「弊社」(heisha), and 「自社」(jisha) in Japanese business writing. Learn correct reading, when t...

「貴社」(kisha) is the written-language Japanese honorific for another company. Learn the correct reading, common misreading...

A comprehensive guide on how to answer the "What is your desired salary?" question in interviews. Covers how to determin...